Cheesy Garlic Chicken Wraps
Crispy golden chicken wraps filled with melted cheese, garlic butter, and tender chicken. Perfect for quick dinners, lunch, or party appetizers.


Building the Perfect Chicken Filling
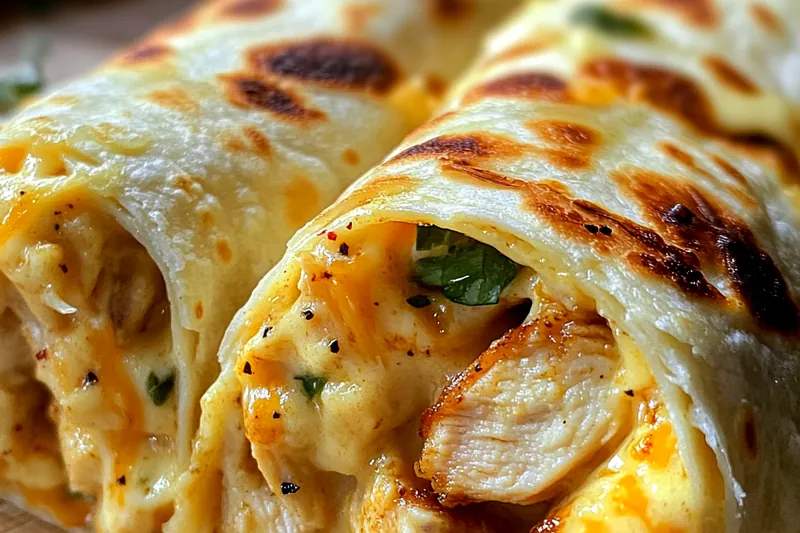
The key to exceptional chicken wraps lies in properly seasoning and cooking the chicken. Dicing the chicken into uniform pieces ensures even cooking and makes it easier to wrap. The combination of spices creates a flavorful base that pairs perfectly with the rich garlic butter.
Cooking the chicken at the right temperature is crucial - too high and it becomes tough, too low and it won't develop the golden exterior that adds texture to the wrap. The garlic butter finish not only adds flavor but helps keep the chicken moist and aromatic.
💡 Professional Tip
Don't overcrowd the pan when cooking chicken - work in batches if necessary. This ensures proper browning and prevents steaming, which would make the chicken tough.
Frequently Asked Questions
Yes! Use rotisserie chicken or leftover cooked chicken. Just warm it through with the garlic butter mixture before assembling the wraps.
Don't overfill, fold the sides in first, then roll tightly. Cook seam-side down first to help seal the wrap closed.
You can prep the filling up to 2 days ahead, but assemble and cook the wraps just before serving for best texture and crispiness.
You can omit it or substitute with additional sour cream or mayonnaise. The cream cheese helps bind the cheese mixture and adds richness.
Yes, brush with melted butter and bake at 400°F for 12-15 minutes, flipping halfway through. They won't be quite as crispy but will still be delicious.
Warm tortillas slightly before filling to make them more pliable. Don't overstuff, and handle gently when rolling.
Assembled but uncooked wraps can be frozen for up to 3 months. Cook directly from frozen, adding 2-3 extra minutes per side.
They pair well with salsa, guacamole, ranch dressing, or a simple side salad. Pickles also make a great tangy accompaniment.
Recipe Troubleshooting Guide
Soggy Wraps
Problem: Wraps turn out soggy instead of crispy
Solution: Ensure chicken is well-drained before assembling, don't overfill with wet ingredients, and cook over proper medium heat until golden.
Cheese Not Melting
Problem: Cheese doesn't melt properly inside wrap
Solution: Use room temperature cream cheese, cook wraps covered for part of the time to create steam, and ensure cheese mixture is well distributed.
Dry Chicken
Problem: Chicken filling turns out dry
Prevention: Don't overcook chicken, use enough garlic butter to coat well, and ensure pieces aren't too small as they cook faster.
Wraps Fall Apart
Problem: Wraps unroll or tear during cooking
Recovery: Don't overfill, roll tightly, cook seam-side down first, and use gentle pressure when flipping.
Uneven Browning
Problem: Some parts of wrap brown faster than others
Prevention: Ensure even heat distribution, don't use too high heat, and rotate wrap if necessary for even cooking.
Flavor Balance Issues
Too Sweet: Add more garlic powder or black pepper to the chicken seasoning
Too Salty: Balance with a squeeze of fresh lemon or serve with fresh vegetables
Bland: Increase garlic, add hot sauce, or include more fresh herbs like parsley or cilantro
Creating the Ultimate Cheese Blend
The cheese mixture is what transforms these from simple chicken wraps to something special. The combination of mozzarella and cheddar provides both meltability and flavor, while cream cheese acts as a binder and adds richness that helps the filling stay cohesive.
Fresh herbs and seasonings elevate the cheese mixture beyond basic melted cheese. The Italian seasoning and fresh parsley add complexity, while the sour cream provides tang that balances the richness and helps create a creamy texture.
Essential Ingredient Notes
- Chicken Breast: Cut into uniform 1/2-inch pieces for even cooking. Pound slightly if thick to ensure consistent thickness and cooking time.
- Cheese Selection: Use freshly shredded cheese for better melting. Pre-shredded works but may not melt as smoothly due to anti-caking agents.
- Tortilla Choice: Large flour tortillas work best - they're pliable and sturdy enough to hold the filling without tearing during cooking.
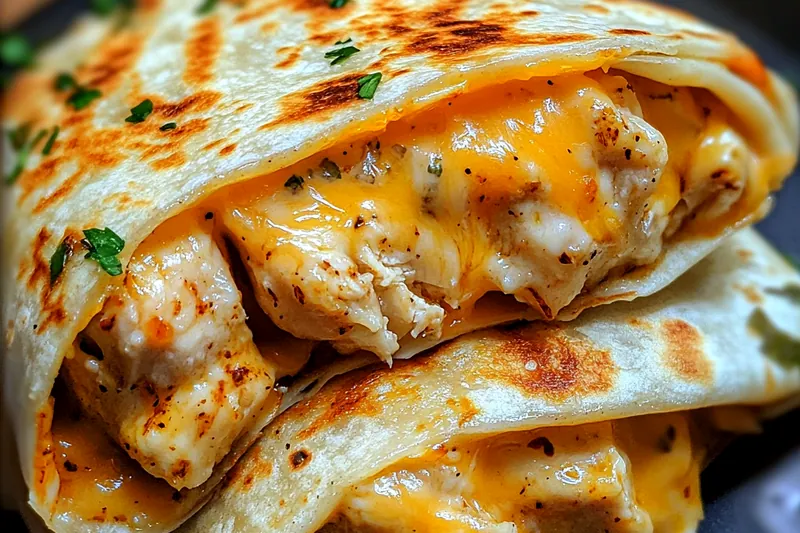
Mastering the Crispy Exterior
Achieving the perfect crispy exterior requires proper heat control and technique. Medium heat allows the tortilla to crisp without burning while giving the cheese time to melt completely. Starting seam-side down helps seal the wrap and prevents unrolling.
A light coating of butter in the pan creates the golden color and crispy texture that makes these wraps irresistible. The key is patience - rushing with high heat will burn the outside before the cheese melts inside.
Perfect Wrap Technique
Fold sides in first, then roll from bottom to top, keeping filling compact. Apply gentle pressure while rolling to create a tight wrap that won't unroll during cooking.
Cheesy Garlic Chicken Wraps
📋 Ingredients
For the Garlic Chicken
- 200g shredded mozzarella cheeseExcellent melting properties
- 100g shredded cheddar cheeseAdds sharp flavor
- 60g cream cheese, softenedBinds mixture and adds creaminess
- 2 tbsp fresh parsley, choppedFresh herb flavor
- 1 tsp Italian seasoningAdds complexity
- 120ml sour creamCreates creamy texture
- 2 green onions, slicedFresh onion flavor
For the Cheese Filling
- 4 large flour tortillasSturdy base for wrapping
- 450g boneless chicken breast, dicedCut into uniform pieces
- 2 tsp garlic powderEssential for flavor base
- 1 tsp onion powderAdds savory depth
- 30ml olive oilFor cooking chicken
- 60g unsalted butterCreates rich garlic butter
- 4 cloves garlic, mincedFresh garlic for maximum flavor
Instructions
Season and Cook Chicken
Season diced chicken with garlic powder, onion powder, paprika, salt, and pepper. Heat olive oil in large skillet over medium-high heat. Cook chicken 6-8 minutes until golden and cooked through.
Make Garlic Butter
In same skillet, melt butter and add minced garlic. Cook 1 minute until fragrant. Return chicken to pan, toss to coat with garlic butter. Remove from heat.
Prepare Cheese Mixture
In bowl, combine mozzarella, cheddar, softened cream cheese, parsley, and Italian seasoning. Mix in sour cream until well combined.
Assemble Wraps
Spread cheese mixture on each tortilla. Add garlic butter chicken and green onions. Fold in sides, then roll tightly from bottom to create secure wrap.
Cook Until Crispy
Heat clean skillet over medium heat with a little butter. Cook wraps seam-side down first, 2-3 minutes per side until golden and cheese is melted. Slice diagonally and serve immediately.
Recipe Notes & Tips
Make-Ahead Tips
Chicken filling can be prepared up to 2 days ahead and stored in refrigerator. Assemble and cook wraps just before serving for best texture and crispiness.
Serving Suggestions
Serve with salsa, guacamole, or ranch dressing for dipping. A simple side salad or roasted vegetables make great accompaniments for a complete meal.
Storage and Reheating
Leftover wraps can be stored in refrigerator for 2 days. Reheat in a dry skillet over medium heat for 2-3 minutes per side to restore crispiness.