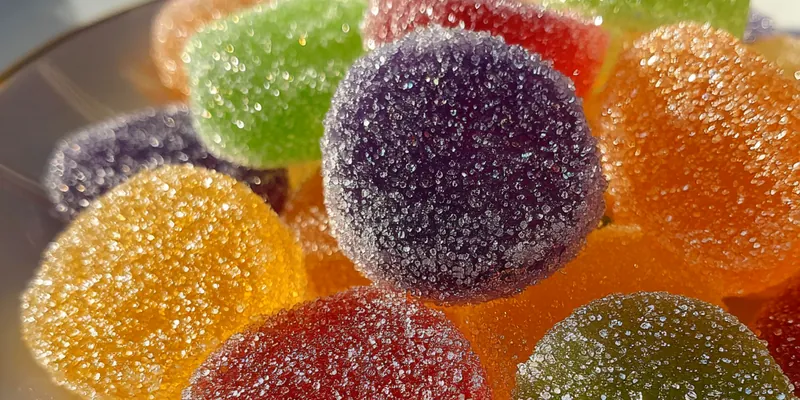
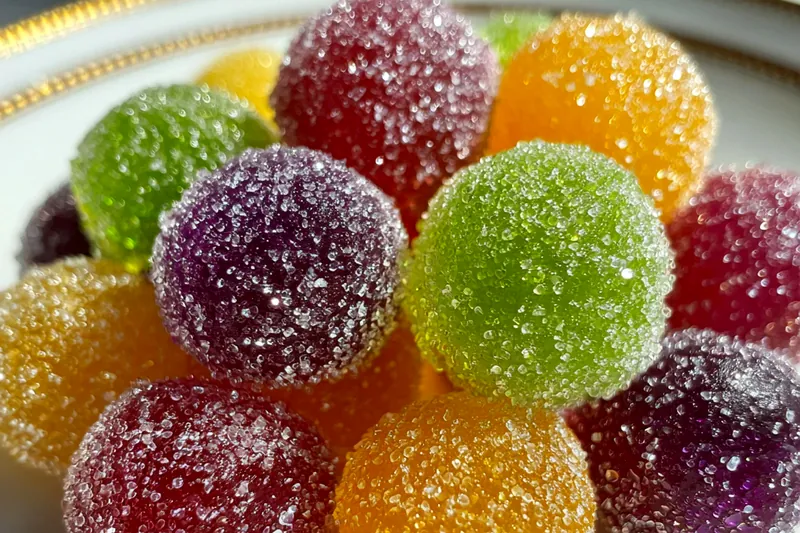
Colorful Sugary Candies
Colorful Sugary Candies are a delightful treat that appeals to both kids and adults alike. This recipe is simple and perfect for parties, holidays, or just a sweet snack at home. With vibrant colors and fun shapes, these candies are sure to brighten up any occasion. Let's jump into this fun and easy candy-making adventure!

Why This Colorful Sugary Candies Recipe Works
This recipe stands out due to its vibrant colors and customizable flavors. You can easily adjust the colors and even the sweetness to suit your preferences. Plus, the simplicity of the ingredients makes it accessible for anyone to try their hand at candy-making.
The technique used in this recipe allows for a hard-crack texture without being overly complicated. By monitoring the temperature closely, you ensure that the candies achieve the perfect crunch while retaining their beautiful colors.
💡 Professional Tip
For the best results, ensure your candy thermometer is calibrated and monitor the temperature closely. Using a silicone mold can also help in easy release and minimize cleanup.
Frequently Asked Questions
Absolutely! You can make these candies a few days in advance. Just store them in an airtight container at room temperature to maintain their texture and flavor. It’s a great way to prepare for parties or special events!
If you need a substitute for corn syrup, you can use honey, maple syrup, or agave nectar. Keep in mind that these alternatives may slightly alter the flavor and texture of the candies, but they will still work well in this recipe.
The candies are done when the mixture reaches 300°F on a candy thermometer, which is known as the hard crack stage. This means that when dropped into cold water, it will harden immediately and form a brittle texture.
Freezing is not recommended as it can alter the texture and make the candies sticky. Instead, store them in a cool, dry place away from direct sunlight to keep them fresh.
These candies are perfect on their own but can also be served alongside ice cream, cupcakes, or as part of a dessert platter. They add a fun pop of color and sweetness to any dessert table!
These candies are best stored at room temperature and can last for up to 2 weeks when kept in an airtight container. Refrigerating them can cause them to become sticky.
Yes, making them in advance is a great idea, especially for parties. Just make sure to store them properly in an airtight container to keep them fresh and flavorful until you're ready to serve.
These candies should not be reheated as they can lose their texture and become sticky. Enjoy them at their best by serving them fresh out of the molds.
Recipe Troubleshooting Guide
Too Dry
Problem: If your candies come out too dry, they might have been overcooked.
Solution: To prevent this, monitor the temperature closely and remove the mixture from heat as soon as it reaches the desired temperature.
Not Crispy Enough
Problem: If your candies aren't crispy, they may not have reached the hard crack stage.
Solution: Ensure you cook the sugar mixture until it reaches 300°F for a perfect crunch.
Overcooked
Problem: Overcooking can lead to burnt candies.
Prevention: To prevent this, use a reliable candy thermometer and check the temperature frequently during cooking.
Undercooked Center
Problem: If the candies have a gooey center, they are undercooked.
Recovery: Reheat the candies gently to reach the correct temperature and re-pour them into molds.
Burnt Exterior
Problem: If the exterior of the candies is burnt, they were cooked too long.
Prevention: Keep an eye on the cooking time and temperature to avoid burning the mixture. Stirring occasionally can also help.
Flavor Balance
Too Sweet: If the candies are too sweet, consider reducing the sugar next time or adding a bit more citric acid for a tangy flavor.
Too Salty: If the candies taste too salty, ensure you measure your salt accurately next time.
Bland: For bland candies, try adding a dash more vanilla or experiment with different flavor extracts.
Essential Ingredients for Colorful Sugary Candies
The main ingredients include sugar, corn syrup, and water, which form the candy base. Food coloring and flavorings allow for customization to suit any taste or occasion. The use of citric acid adds a delightful tanginess to brighten the overall flavor.
Quality ingredients are key to achieving the best results. Opt for pure vanilla extract for optimal flavor, and choose high-quality food coloring to ensure vibrant colors. Always use fresh ingredients for the best texture and taste.
Essential Ingredient Notes
- Granulated Sugar: Granulated sugar is essential for sweetness and achieving the right texture in candies. Make sure to use a fine grain for even melting and cooking.
- Corn Syrup: Corn syrup helps prevent crystallization of sugar, ensuring a smooth candy mixture. It's crucial for achieving that perfect chewy consistency.
- Food Coloring: Using high-quality food coloring is key to vibrant candies. Gel food colors provide more intense hues without adding extra liquid, making them ideal for candy making.
Step-by-Step Cooking Process
Cooking Colorful Sugary Candies involves a simple process of combining ingredients and monitoring temperatures. This candy-making adventure can be both fun and rewarding, especially with kids.
Achieving perfect results requires patience and careful attention to the boiling process. With practice, you'll master the art of candy-making and impress your friends with beautiful homemade treats.
Key Technique for Perfect Colorful Sugary Candies
The most important technique in making these candies is reaching the hard crack stage at the right temperature. This ensures a crunchy texture that holds its shape while being flavorful and colorful.
Colorful Sugary Candies
📋 Ingredients
Main Ingredients
- 1 cup butterRoom temperature
- 1/2 cup heavy creamFor richness
- 1/4 cup milkFor creaminess
- 1 teaspoon vanilla extractFor flavor
For the Sauce
- 2 cups granulated sugarPrimary sweetener
- 1 cup corn syrupPrevents crystallization
- 1/2 cup waterTo dissolve sugar
- 1/4 teaspoon saltEnhances flavor
- 1 teaspoon vanilla extractAdds aroma
- 1/4 teaspoon baking sodaFor texture
- Food coloring (red, blue, green, yellow)For vibrant colors
- Non-stick cooking sprayFor easy release
Instructions
Prepare the Work Area
Grease your candy molds with non-stick cooking spray and set them aside. Prepare a work surface with powdered sugar to prevent sticking.
Combine Ingredients
In a medium saucepan, combine granulated sugar, corn syrup, water, and salt. Stir until the sugar is dissolved.
Cook the Mixture
Place the saucepan over medium heat. Attach the candy thermometer and allow the mixture to boil without stirring until it reaches 300°F (hard crack stage).
Add Flavor and Color
Remove the saucepan from heat and carefully stir in the vanilla extract, baking soda, and citric acid. Divide the mixture into separate bowls for coloring.
Color the Candy
Add your desired food coloring to each bowl and mix until the colors are vibrant. Use red, blue, green, and yellow for a colorful assortment.
Pour into Molds
Carefully pour the colored mixtures into the prepared candy molds. Gently tap the molds to remove air bubbles.
Let It Set
Allow the candies to cool and harden at room temperature for about 30 minutes. Once set, they should release easily from the molds.
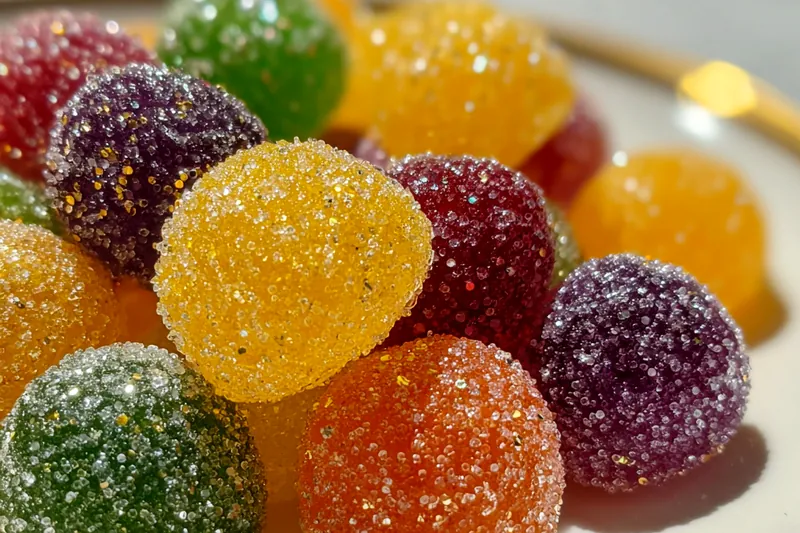
Decorate the Candies
If desired, sprinkle edible glitter and decorative sprinkles on the candies before they are completely hardened.
Serve and Enjoy
Once fully hardened, remove the candies from the molds and enjoy! Store any leftovers in an airtight container.
Recipe Notes & Tips
Storage Tips
To keep your Colorful Sugary Candies fresh, store them in an airtight container at room temperature. Avoid exposure to humidity, which can make them sticky. If properly stored, they can last up to two weeks.
Serving Suggestions
These vibrant candies can be served in goodie bags for parties or as a colorful centerpiece on dessert tables. Consider pairing them with other sweets like cupcakes or cookies for a delightful spread.
Recipe Variations
Feel free to experiment with different flavorings and color combinations. For a twist, try adding essential oils like peppermint or almond for added flavor. You can also incorporate different shapes using various molds.