Crispy Garlic Potato Pops
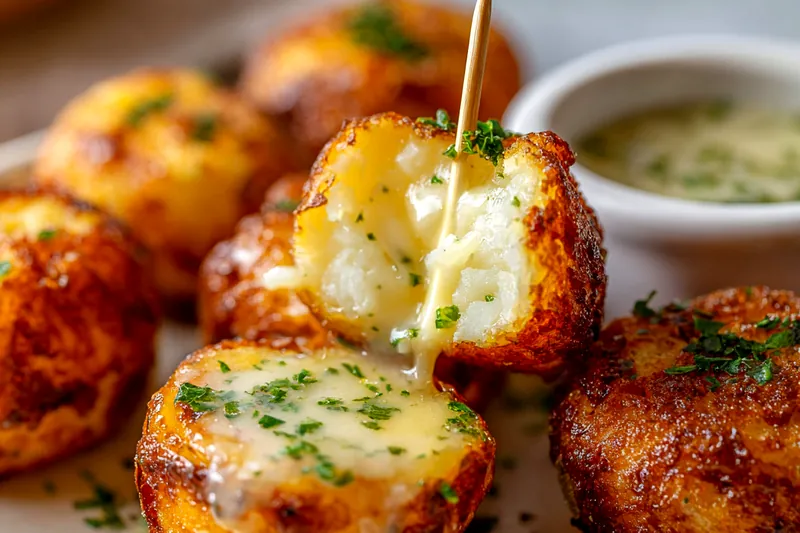
These Crispy Garlic Potato Pops are the ultimate party appetizer that disappears in minutes! Tender baby potatoes are boiled until creamy, then fried to golden perfection and tossed in an irresistible garlic butter sauce. With their crispy exterior and fluffy interior, these bite-sized treats are perfect for game day, holiday gatherings, or anytime you need a crowd-pleasing snack.


Why These Potato Pops Are So Addictive
The secret to these incredible Garlic Potato Pops lies in the two-step cooking method that creates an irresistible texture contrast. First, boiling the baby potatoes makes them tender and creamy throughout, ensuring that fluffy interior everyone loves. This step also partially breaks down the potato's surface, which is crucial for the next step. When you fry already-cooked potatoes, the moisture inside creates steam that puffs up the exterior while the direct heat crisps it to golden perfection.
The garlic butter coating takes these from good to absolutely crave-worthy. By gently cooking the garlic in butter rather than raw, you develop a mellow, sweet garlic flavor that coats every crevice of the crispy potato surface. Fresh parsley adds brightness and a pop of color, while the optional Parmesan creates a savory umami layer that keeps people reaching for more. The combination of textures and flavors hits all the right notes - crispy, creamy, buttery, garlicky, and utterly satisfying.
💡 Professional Tip
The key to maximum crispiness is ensuring potatoes are completely dry before frying. After boiling and draining, let them steam-dry for 5 minutes, then gently pat with paper towels. Any excess moisture will cause spattering and prevent that perfect golden crust from forming.
Frequently Asked Questions
You can boil the potatoes up to 24 hours in advance and store them covered in the refrigerator. However, for best results, fry them just before serving. If you must prepare them completely ahead, fry them, let cool, and refrigerate. Reheat in a 400°F oven for 8-10 minutes to restore crispiness, then toss with fresh garlic butter before serving.
Yes, but you'll need to cut them into 1-1.5 inch cubes after boiling. Baby potatoes work best because they're naturally bite-sized and their thin skin becomes wonderfully crispy. If using larger potatoes, choose waxy varieties like Yukon Gold or red potatoes, as they hold their shape better than russets when boiled and fried.
Absolutely! After boiling, toss the potatoes with olive oil and roast at 425°F for 25-30 minutes, turning halfway through, until golden and crispy. They won't be quite as crispy as fried, but they'll still be delicious. Toss with garlic butter immediately after removing from the oven.
Look for small fingerling potatoes, new potatoes, or marble-sized potatoes at your grocery store. You can also use the smallest red or Yukon Gold potatoes available and cut them in half. The key is maintaining that one or two-bite size for the perfect pop-in-your-mouth experience.
Potatoes are perfectly cooked when they're golden brown on all sides and you can hear a distinct crispy sound when you turn them in the pan. They should feel firm when pressed gently with a spatula, and the skin should have small crackling areas. If they start to get too dark before crisping, lower the heat slightly.
These potato pops are perfect alongside other appetizers like buffalo wings, mozzarella sticks, or vegetable platters. For dipping, offer ranch dressing, sour cream with chives, spicy aioli, or extra garlic butter. They also work wonderfully as a side dish to grilled meats or as part of a tapas-style dinner spread.
Definitely! Try tossing with Cajun seasoning and melted butter for spicy potato pops, or use rosemary and lemon zest for a Mediterranean twist. For loaded potato pops, top with bacon bits, cheddar cheese, and sour cream. Buffalo potato pops are amazing too - just toss with buffalo sauce and serve with blue cheese dressing.
Store leftover potato pops in an airtight container in the refrigerator for up to 3 days. Reheat in a 375°F oven for 10-12 minutes or in an air fryer at 375°F for 5-7 minutes until crispy again. Avoid microwaving as this will make them soggy. Add a fresh drizzle of garlic butter after reheating for best flavor.
Recipe Troubleshooting Guide
Potatoes Are Soggy
Problem: Your potato pops turned out soft and soggy instead of crispy.
Solution: This usually happens when potatoes aren't dried properly before frying or when the oil isn't hot enough. Make sure to pat potatoes completely dry after boiling. Heat your oil until it shimmers before adding potatoes, and don't overcrowd the pan - fry in batches so steam can escape and potatoes can crisp properly.
Potatoes Breaking Apart
Problem: Your potatoes are falling apart when you try to fry them.
Solution: You've overcooked them during the boiling stage. Potatoes should be fork-tender but still hold their shape - test at 12 minutes and remove from heat as soon as a fork pierces easily but with slight resistance. Use waxy potatoes like baby potatoes or red potatoes, which hold their shape better than starchy russets.
Garlic Is Burning
Problem: The garlic in your butter is turning bitter and brown.
Prevention: Garlic burns easily at high heat. Always cook it over medium-low heat and remove from heat as soon as it becomes fragrant (2-3 minutes). If it starts to brown, immediately remove the pan from heat. You can also add minced garlic to melted butter off the heat and let it infuse gently rather than cooking it directly.
Uneven Browning
Problem: Some potatoes are crispy and golden while others are pale and soft.
Recovery: This happens when potatoes are different sizes or when you don't turn them frequently enough. Sort potatoes by size before cooking and use only similar-sized ones for each batch. Turn potatoes every 90 seconds during frying to ensure all sides get equal contact with the hot pan.
Butter Coating Not Sticking
Problem: The garlic butter mixture slides off the potatoes instead of coating them.
Prevention: The potatoes need to be hot when you add the butter - the heat helps the butter absorb into the crispy surface. Toss potatoes with butter immediately after frying while they're still steaming hot. Also, make sure you're using enough butter and tossing gently but thoroughly to coat every surface.
Flavor Balance Issues
Too Sweet: If potatoes taste unexpectedly sweet, you may have used a sweet variety - balance with extra salt, black pepper, and garlic.
Too Salty: If too salty, serve with unsalted dipping sauces like plain sour cream or make an additional batch without salt to mix in.
Bland: If flavor is flat, increase the garlic, add more fresh herbs, include Parmesan cheese, or try a finishing sprinkle of smoked paprika or cayenne pepper.
Choosing the Perfect Potatoes
Baby potatoes are the star of this recipe, and selecting the right ones makes all the difference. Look for firm, smooth potatoes that are roughly 1 to 1.5 inches in diameter - this size is perfect for one or two bites. Baby red potatoes and baby Yukon Golds are ideal because they have a naturally waxy texture that holds up beautifully during boiling and frying. Their thin skins become delightfully crispy when fried, adding texture without being tough or chewy.
Avoid using starchy varieties like russet potatoes for this recipe, as they tend to break apart more easily and don't develop the same creamy interior texture. When shopping, gently squeeze potatoes to ensure they're firm with no soft spots or sprouts. Store them in a cool, dark place but not in the refrigerator, as cold temperatures convert potato starch to sugar, affecting both texture and flavor. Fresh, high-quality potatoes will give you the best results with that perfect contrast between crispy exterior and fluffy interior.
Essential Ingredient Notes
- Baby Potatoes: Choose potatoes that are uniform in size for even cooking. Look for smooth, firm specimens without green spots, which indicate solanine and can taste bitter. Baby Yukon Golds offer a buttery flavor, while baby reds provide a slightly firmer texture.
- Fresh Garlic: Fresh garlic is essential here - garlic powder won't provide the same aromatic punch. Mince it finely so it distributes evenly in the butter. For milder flavor, you can reduce to 4 cloves; for garlic lovers, increase to 8 cloves. Remove any green sprouts from the center of cloves as these can taste bitter.
- Fresh Parsley: Flat-leaf Italian parsley has a more robust flavor than curly parsley and looks more elegant, but either works. Chop it finely just before using to preserve its bright color and fresh flavor. You can substitute with fresh chives, cilantro, or a combination for different flavor profiles.
Mastering the Double-Cook Technique
The magic of these Garlic Potato Pops comes from the double-cook method that professional chefs use for the crispiest potatoes. First, boiling the potatoes in salted water seasons them from the inside out while making them perfectly tender. The boiling process also roughens up the potato surface slightly, which is exactly what you want - these tiny crevices and rough patches will become extra crispy when you fry them. Don't skip the resting period after boiling; letting them cool for 5 minutes allows excess moisture to evaporate, which is crucial for achieving maximum crispiness in the frying stage.
During the frying stage, patience is key to developing that incredible golden crust. Make sure your oil is properly heated before adding potatoes - it should shimmer but not smoke. Fry in small batches to maintain oil temperature and allow proper air circulation around each potato. As they fry, you'll hear the sizzling sound change from aggressive bubbling to a gentler, crisper sound - that's when you know the exterior has reached peak crispiness. The moment you transfer them to the bowl and toss with garlic butter is crucial; the hot potatoes will absorb the butter into every crispy crevice, creating pockets of concentrated garlic flavor throughout.
The Perfect Boil-Then-Fry Method
Start with cold, salted water to ensure even cooking from the outside in. Boil just until fork-tender (12-15 minutes) - overcooked potatoes will fall apart when fried. After draining, let them steam-dry for 5 minutes before frying. This two-step process creates a unique texture: the boiling makes them creamy inside while the frying creates an incredibly crispy shell that's impossible to achieve with just one cooking method.
Crispy Garlic Potato Pops
📋 Ingredients
Main Ingredients
- 4 tablespoons unsalted butter, meltedUse unsalted to control seasoning; European-style butter adds richness
- 6 cloves garlic, mincedFresh garlic is essential; adjust to taste (4-8 cloves)
- 1/4 cup fresh parsley, finely choppedFlat-leaf Italian parsley preferred; can substitute with chives
- 1/4 teaspoon garlic powderBoosts garlic flavor without adding moisture
- Optional: 1/4 cup grated Parmesan cheeseAdds savory umami depth; use freshly grated for best flavor
Garlic Butter Coating
- 2 lbs baby potatoes (1-1.5 inch diameter)Choose uniform size; baby Yukon Golds or reds work best
- 2 tablespoons olive oilFor frying; can substitute with vegetable or avocado oil
- 1 teaspoon sea saltFor seasoning final dish; adjust to taste
- 1/2 teaspoon black pepperFreshly ground pepper provides best flavor
Instructions
Prepare Potatoes
Wash baby potatoes thoroughly and pat dry. Place potatoes in a large pot, cover with cold water, add 1 tablespoon salt, and bring to a boil. Cook for 12-15 minutes until fork-tender but not mushy. Drain and let cool for 5 minutes.
Create Garlic Butter
While potatoes cook, melt butter in a small saucepan over medium-low heat. Add minced garlic and cook for 2-3 minutes until fragrant but not browned. Remove from heat and stir in chopped parsley. Set aside.
Fry Potatoes
Heat olive oil in a large skillet over medium-high heat. Working in batches, add boiled potatoes and fry for 5-7 minutes, turning occasionally, until golden brown and crispy on all sides. The skin should become beautifully crisp and crackled.
Coat and Season
Transfer crispy potatoes to a large mixing bowl. Immediately pour the garlic butter mixture over hot potatoes and toss gently to coat evenly. Season with salt, pepper, and garlic powder. Toss again to ensure every potato pop is well-coated.
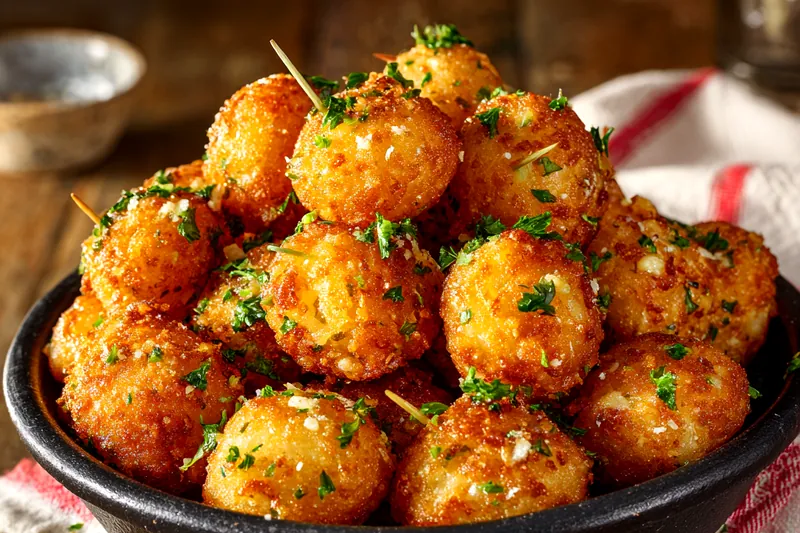
Serve
Transfer to a serving bowl and garnish with additional fresh parsley and optional Parmesan cheese. Insert toothpicks for easy serving. Serve immediately while hot and crispy with extra garlic butter on the side for dipping.
Recipe Notes & Tips
Storage
Store leftover Garlic Potato Pops in an airtight container in the refrigerator for up to 3 days. Reheat in a 375°F oven for 10-12 minutes or in an air fryer at 375°F for 5-7 minutes to restore crispiness. Add a fresh drizzle of garlic butter after reheating. Do not microwave as this will make them soggy.
Serving Suggestions
Serve these potato pops as an appetizer with toothpicks for easy grabbing at parties. They pair beautifully with dipping sauces like ranch dressing, garlic aioli, spicy ketchup, or sour cream with chives. They also make an excellent side dish for grilled steaks, roasted chicken, or as part of a tapas-style spread. For a complete appetizer platter, serve alongside mozzarella sticks, buffalo wings, and fresh vegetables with dip.
Variations
Spicy: Toss with Cajun seasoning and cayenne pepper. Loaded: Top with crumbled bacon, shredded cheddar, and sour cream. Mediterranean: Use rosemary instead of parsley and add lemon zest. Buffalo Style: Toss with buffalo sauce and serve with blue cheese dressing. Herb: Add fresh thyme, rosemary, and oregano to the butter. Truffle: Add truffle oil to the butter for a gourmet twist.