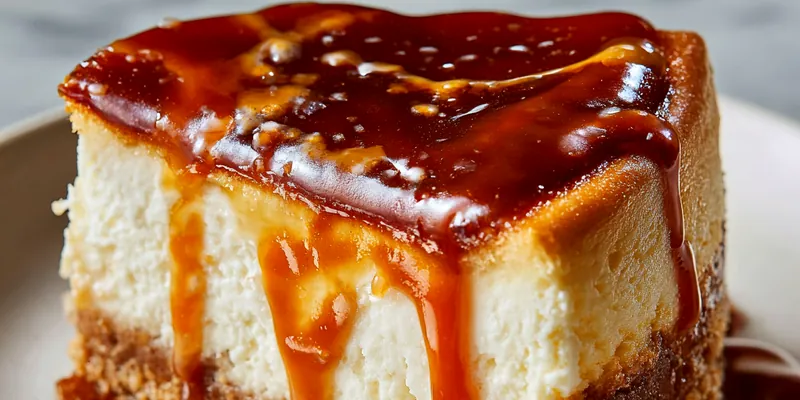
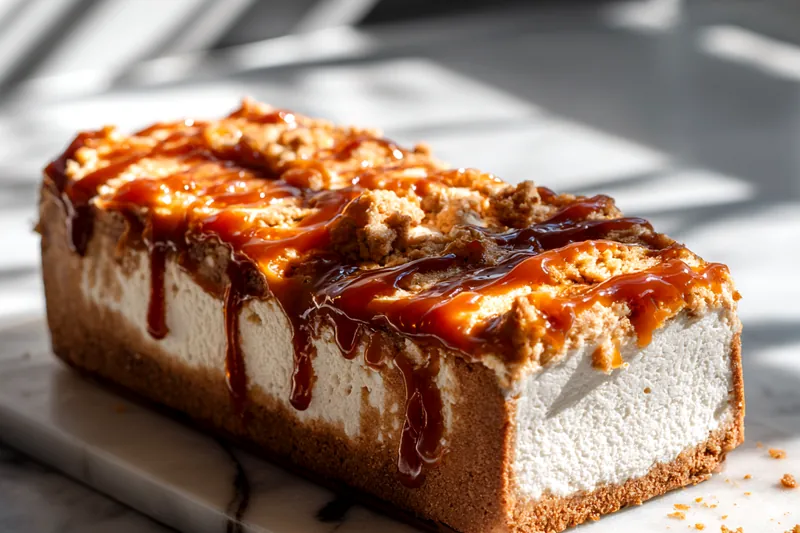
Crème Brûlée Cheesecake
This show-stopping Crème Brûlée Cheesecake combines two beloved desserts into one extraordinary creation. The ultra-creamy vanilla bean filling sits atop a buttery graham crust, crowned with a crackling caramelized sugar shell that shatters perfectly with each spoonful. It's the ultimate special occasion dessert that looks incredibly impressive but is surprisingly achievable at home.

The Art of Perfect Cheesecake Texture
Achieving that signature creamy, dense texture requires understanding a few key principles. Room temperature ingredients are absolutely essential because cold cream cheese creates lumps that are nearly impossible to eliminate, resulting in a grainy texture. The water bath method, while seeming fussy, prevents cracking by providing gentle, even heat that allows the proteins to set slowly without toughening. Think of it as creating a spa environment for your cheesecake rather than shocking it with direct oven heat.
The slight jiggle in the center when you remove the cheesecake from the oven is your visual cue for perfection. Many bakers make the mistake of waiting until the entire surface is set, which leads to an overcooked, dry texture. That center will firm up completely during the cooling and chilling process, so trust the jiggle. The gradual cooling in the oven with the door cracked prevents the dramatic temperature change that causes those unsightly cracks across the surface.
💡 Professional Tip
Always run a thin knife around the edges of your cheesecake as soon as you remove it from the oven. As the cheesecake cools and contracts, this prevents it from pulling away from the sides and cracking.
Frequently Asked Questions
Absolutely! This cheesecake actually tastes better when made ahead. Prepare the cheesecake completely, but wait to caramelize the sugar topping until just before serving. You can make it up to 3 days in advance and store it covered in the refrigerator. The flavors meld beautifully overnight, creating an even more cohesive taste. Just remember to bring it to room temperature for about 15 minutes before torching the top and serving.
If you can't find vanilla bean paste, you can scrape the seeds from 2 vanilla beans and use those along with 1 tablespoon of vanilla extract. Alternatively, use 3 tablespoons of high-quality vanilla extract, though you'll miss out on those beautiful vanilla specks. Madagascar bourbon vanilla beans work best for their rich, creamy flavor that complements the cheesecake perfectly.
Yes, but the results won't be quite as perfect. You can use your oven's broiler by placing the chilled cheesecake on the top rack and watching it carefully for 1-2 minutes until the sugar caramelizes. However, this risks warming the cheesecake too much and creates less even caramelization. A kitchen torch gives you precise control and creates that signature thin, crackling layer. They're inexpensive and useful for many recipes, so they're worth the investment.
Cracks typically form from overmixing, overbaking, or rapid temperature changes. Mix the batter on low speed once you add the eggs to avoid incorporating too much air. Remove the cheesecake when the center still jiggles, and allow it to cool gradually in the turned-off oven. The water bath also helps prevent cracking by maintaining moisture. If small cracks do appear, don't worry—the caramelized sugar topping will cover most imperfections beautifully.
The cheesecake is done when the edges are set and slightly puffed, but the center 3-4 inches still jiggles like gelatin when you gently shake the pan. An instant-read thermometer inserted into the center should read 150-155°F. The cheesecake will continue cooking as it cools, reaching the perfect consistency. If you wait until the entire surface is firm, you've overbaked it and the texture will be dry rather than luxuriously creamy.
This rich cheesecake pairs beautifully with fresh berries like raspberries or strawberries, which provide a tart contrast to the sweet caramelized top. A dollop of lightly sweetened whipped cream adds elegance, or try a drizzle of berry coulis for extra sophistication. For beverages, serve with espresso, cappuccino, or a sweet dessert wine like Sauternes. The cheesecake is so flavorful that it truly needs nothing more than perhaps a mint leaf garnish.
Yes! Freeze the cheesecake without the caramelized sugar topping. Wrap it tightly in plastic wrap, then aluminum foil, and freeze for up to 2 months. Thaw overnight in the refrigerator, then add the turbinado sugar and torch it just before serving. Freezing actually helps the texture become even more dense and creamy. Never freeze after torching, as the caramelized sugar will become sticky and lose its crackling texture.
Store leftover cheesecake covered in the refrigerator for up to 5 days. The caramelized sugar topping will gradually soften as it absorbs moisture, so it won't maintain that perfect crack, but the flavor remains excellent. If you prefer, you can scrape off the softened sugar layer, add fresh turbinado sugar, and re-torch individual slices as needed. Always cover tightly with plastic wrap or store in an airtight container to prevent the cheesecake from absorbing refrigerator odors.
Recipe Troubleshooting Guide
Lumpy Batter
Problem: The cream cheese filling has visible lumps that won't smooth out no matter how much you mix.
Solution: This happens when your cream cheese is too cold. Let all dairy ingredients sit at room temperature for at least 2 hours before starting. If you're in a pinch, cut the cream cheese into cubes and microwave for 10-15 seconds (checking frequently) until just softened but not melted. Beat the cream cheese alone for a full 3 minutes before adding other ingredients to ensure it's completely smooth.
Cracked Surface
Problem: Large cracks appeared across the top of your cheesecake during or after baking.
Solution: Prevent cracks by using a water bath, avoiding overmixing after adding eggs, and cooling gradually. If cracks do appear, you have options: fill them with sour cream mixed with a little powdered sugar, or simply embrace them knowing the caramelized sugar will hide most imperfections. For future bakes, ensure your oven temperature is accurate with an oven thermometer.
Soggy Crust
Problem: The graham cracker crust is soft and soggy instead of crisp and sturdy.
Prevention: Always pre-bake your crust for 10 minutes to set it before adding the filling. Use enough melted butter to hold the crumbs together (the mixture should clump when squeezed), and press it very firmly into the pan using the bottom of a measuring cup. Wrapping the outside of your springform pan with foil prevents water from seeping in during the water bath. If the crust is already soggy, there's no fix, but you can prevent it next time.
Unevenly Caramelized Sugar
Problem: Some areas of the sugar topping are burnt while others are barely melted.
Recovery: Sprinkle the turbinado sugar in a thin, even layer across the entire surface before torching. Keep the torch moving in small circular motions, holding it 3-4 inches from the surface. Work in sections, starting from the center and moving outward. If areas burn before others caramelize, you're holding the torch too close or in one spot too long. Practice makes perfect with torching technique.
Cheesecake Sticking to Pan
Problem: The cheesecake won't release cleanly from the springform pan sides.
Prevention: Always line the bottom of your pan with parchment paper for easy removal. Before adding the filling, lightly spray or butter the sides of the pan. Most importantly, run a thin knife or offset spatula around the edge immediately after removing from the oven, while it's still warm. This breaks the seal between the filling and pan, allowing the cheesecake to contract naturally as it cools without sticking.
Flavor Balance Issues
Too Sweet: If the caramelized sugar makes it too sweet, reduce the turbinado sugar to 1/4 cup and torch until just golden rather than deep amber. You can also balance sweetness by serving with unsweetened whipped cream or tart berries.
Too Salty: If you accidentally used salted butter in the crust, the saltiness will be concentrated at the bottom. Next time use unsalted butter, or reduce the added salt in the filling to 1/8 teaspoon to compensate.
Bland: If the filling tastes bland, you likely skimped on the vanilla. Vanilla bean paste provides much more flavor than extract alone. Also ensure you're using full-fat cream cheese, as reduced-fat versions lack richness and depth of flavor. A pinch more salt also enhances sweetness.

Selecting Quality Ingredients for Superior Flavor
The ingredient quality in cheesecake dramatically affects the final result because there's nowhere for inferior products to hide. Always choose full-fat cream cheese from a reputable brand like Philadelphia, as it has the right moisture content and tang. Store brands often contain more water and stabilizers that can affect texture. Your eggs should be large and as fresh as possible, with bright orange yolks that indicate the hens were well-fed. Heavy cream should be at least 36% fat content for proper richness and stability.
Vanilla makes or breaks this recipe, so invest in high-quality vanilla bean paste or real vanilla beans rather than imitation extract. The paste contains actual vanilla bean seeds that create those gorgeous specks throughout the filling while delivering intense flavor. For the caramelized topping, turbinado sugar is essential because its larger crystals create that perfect crackling texture that regular granulated sugar can't achieve. The raw sugar also has a subtle molasses note that enhances the caramel flavor beautifully.
Essential Ingredient Notes
- Cream Cheese: Always use full-fat brick-style cream cheese, never spreadable or whipped varieties. Let it sit at room temperature for 2-3 hours until it's soft enough to leave an indentation when pressed. Cold cream cheese creates lumps that ruin the silky texture.
- Vanilla Bean Paste: Look for paste with visible vanilla bean seeds suspended in a thick syrup. Nielsen-Massey and Heilala are excellent brands. Store in a cool, dark place and it will last for years. The paste costs more than extract but the flavor intensity and visual appeal justify the investment.
- Turbinado Sugar: This coarse raw sugar (often labeled as Sugar in the Raw) has larger crystals that melt and caramelize more slowly, creating that signature brûlée crack. Regular granulated sugar melts too quickly and creates a thin glaze instead of a brittle shell.
Mastering the Water Bath Technique
The water bath (bain-marie) is non-negotiable for achieving professional cheesecake results. This gentle cooking method surrounds the cheesecake with moist heat, which prevents the edges from overcooking while the center sets and stops the surface from cracking due to rapid moisture loss. Wrap your springform pan thoroughly with two layers of heavy-duty aluminum foil, extending the foil up the sides to prevent any water from seeping in. Place the wrapped pan in a larger roasting pan before adding the filling, then carefully pour hot water to reach halfway up the sides.
The gradual cooling process is equally important for texture and preventing cracks. After baking, turn off the oven and crack the door open about 4 inches, leaving the cheesecake inside for a full hour. This allows the temperature to drop slowly, preventing the dramatic contraction that causes cracks. Once cooled to room temperature, refrigerate for at least 6 hours or preferably overnight, allowing the texture to firm up properly and the flavors to develop fully. Patience during these steps separates good cheesecake from extraordinary cheesecake.
Perfecting the Caramelized Sugar Topping
The caramelized sugar technique requires timing and proper tool handling. Make sure your cheesecake is completely chilled before adding the sugar layer - a cold surface prevents the sugar from melting the filling underneath. Sprinkle a thin, even layer of turbinado sugar across the entire surface, then use a kitchen torch held at a 45-degree angle, keeping it 3-4 inches away from the sugar. Move the flame constantly in small circles, watching as the sugar melts, bubbles, and turns golden amber. Work quickly but carefully, and let the sugar cool for 2-3 minutes to harden into that satisfying crackling shell before serving.
Crème Brûlée Cheesecake
📋 Ingredients
For the Crust
- 1/3 cup turbinado sugar (for caramelizing)Use coarse Sugar in the Raw brand for best crackling texture
For the Filling
- 2 cups graham cracker crumbsAbout 16 full graham crackers, finely crushed
- 1/3 cup granulated sugarFor the crust sweetness
- 1/2 cup unsalted butter, meltedMust be melted and slightly cooled
- 32 oz cream cheese, room temperatureFour 8-oz blocks, must be fully softened
- 1 cup granulated sugarFor the filling sweetness
- 4 large eggs, room temperatureCold eggs cause lumps in the batter
- 1 cup heavy creamFull-fat cream creates richness
- 2 tablespoons vanilla bean pasteCreates those beautiful vanilla specks
- 1 teaspoon vanilla extractEnhances the vanilla flavor
- 1/4 teaspoon saltBalances sweetness and enhances flavor
- 1/2 cup sour creamAdds tang and creamy texture
Instructions
Prepare the Graham Cracker Crust
Preheat your oven to 325°F. In a medium bowl, combine graham cracker crumbs, 1/3 cup sugar, and melted butter, stirring until the mixture resembles wet sand and holds together when squeezed. Press this mixture firmly into the bottom and 1 inch up the sides of a 9-inch springform pan, using the bottom of a measuring cup for even pressure. Bake the crust for 10 minutes until lightly golden and fragrant, then remove and let cool completely while you prepare the filling.
Make the Creamy Cheesecake Filling
In a large mixing bowl, beat the room-temperature cream cheese with an electric mixer on medium speed for 3 full minutes until completely smooth and fluffy with no lumps. Add 1 cup sugar and beat for another 2 minutes until creamy and well incorporated. Reduce mixer speed to low and add eggs one at a time, mixing just until each egg disappears before adding the next. Gently blend in heavy cream, vanilla bean paste, vanilla extract, salt, and sour cream, mixing only until just combined to avoid incorporating excess air.
Bake in Water Bath
Wrap the outside of your springform pan with two layers of heavy-duty aluminum foil, bringing it up the sides to prevent water from seeping in. Place the wrapped pan in a large roasting pan and pour the cheesecake filling into the prepared crust. Carefully transfer the roasting pan to the oven, then pour hot water into the roasting pan until it reaches halfway up the sides of the springform pan. Bake for 60-65 minutes until the edges are set and slightly puffed but the center 3-4 inches still jiggles like gelatin when gently shaken. Turn off the oven, crack the door open, and let the cheesecake cool inside for 1 hour.
Chill and Create the Brûlée Topping
Remove the cheesecake from the water bath, remove the foil, and run a thin knife around the edges to release it from the pan sides. Let cool to room temperature, then cover and refrigerate for at least 6 hours or overnight until completely chilled and set. Just before serving, sprinkle turbinado sugar in an even layer across the entire top surface. Using a kitchen torch held 3-4 inches away at a 45-degree angle, move the flame in circular motions over the sugar until it melts, bubbles, and turns a rich golden amber color. Let the caramelized sugar cool and harden for 2-3 minutes to create that signature crackling shell, then slice with a hot, clean knife and serve immediately.
Recipe Notes & Tips
Storage
Store the cheesecake covered in the refrigerator for up to 5 days. The caramelized sugar will gradually soften, but you can re-torch individual slices. For freezing, wrap tightly without the sugar topping and freeze for up to 2 months. Thaw overnight in the refrigerator before torching.
Serving Suggestions
Serve with fresh raspberries, strawberries, or a berry coulis for a tart contrast. Lightly sweetened whipped cream adds elegance. Pair with espresso, cappuccino, or Sauternes dessert wine. Let the cheesecake sit at room temperature for 10-15 minutes before serving for the best flavor.
Variations
Try different crust options like vanilla wafer, biscoff, or chocolate cookie crumbs. Add a layer of caramel or chocolate ganache under the sugar topping. Infuse the cream with lavender or orange zest for unique flavors. For mini versions, use a muffin tin with cupcake liners and reduce baking time to 25-30 minutes.