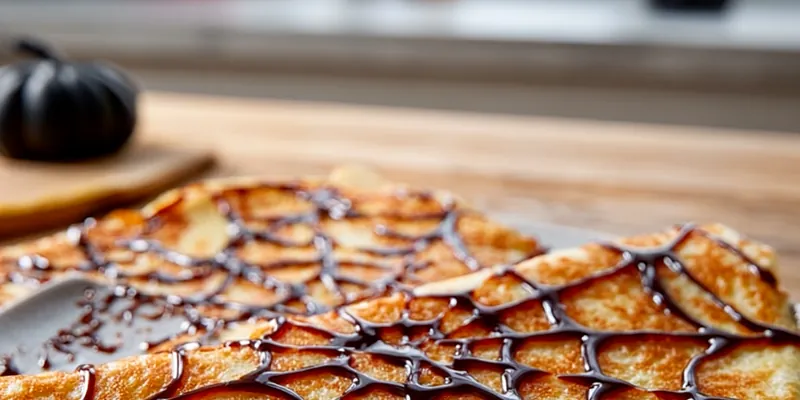
Halloween Spiderweb Crepes
Spooky Halloween spiderweb crepes with a delicate chocolate web design and a sweet cream cheese filling. Perfect for a festive breakfast or dessert on Halloween.

Creating Perfect Spiderweb Designs
The key to stunning spiderweb crepes lies in temperature control and timing. The chocolate for drawing webs should be just melted but not too hot, giving you the perfect consistency for clean lines that won't spread uncontrollably or harden too quickly before you can create the web effect.
When drawing the spiral, start from the center and work outward with a steady hand. Wait about 10 seconds before using a toothpick to create the web lines—this allows the chocolate to set slightly but remain workable. Pull the toothpick from the center outward in even intervals for the classic web appearance.
💡 Professional Tip
For the most defined web pattern, chill your crepes for 2-3 minutes after creating the web design. This quickly sets the chocolate without drying out the crepe, ensuring your design remains intact when serving.
Frequently Asked Questions
Yes, you can make the crepes up to 24 hours ahead. Store them with parchment paper between each crepe in an airtight container in the refrigerator. Add the chocolate web design just before serving for the best visual impact.
Absolutely! Dark, semi-sweet, or milk chocolate all work well. Dark chocolate creates more dramatic contrast against the white crepe, while milk chocolate provides a more subtle effect with a sweeter taste.
You can use a plastic sandwich bag with a tiny corner snipped off, or even a squeeze bottle used for decorating. In a pinch, you can also use a fork dipped in chocolate to create a more rustic web pattern.
Add edible glitter to the cream cheese filling, use purple or green food coloring instead of orange, or add a few drops of black food coloring to the chocolate crepe batter for an even darker effect. Small candy eyes placed on the web also create a fun touch.
Yes, substitute the all-purpose flour with your favorite gluten-free flour blend. You may need to adjust the liquid slightly as gluten-free flours often absorb moisture differently than regular flour.
Nutella, pumpkin butter, maple whipped cream, or a simple vanilla custard all work beautifully. For a less sweet option, try a Greek yogurt filling flavored with honey and cinnamon.
Yes, you can freeze the plain crepes (without web design or filling) for up to 1 month. Place parchment paper between each crepe, wrap well in plastic, and store in a freezer bag. Thaw completely before adding the web design and filling.
Use a ladle to portion batter consistently, and quickly tilt the pan in a circular motion right after adding the batter. A crepe pan helps, but any non-stick skillet works well with practice. The key is a hot, evenly heated surface and the right amount of batter.
Recipe Troubleshooting Guide
Broken Web Design
Problem: Chocolate web breaks or doesn't form clean lines
Solution: Ensure chocolate is melted but not too hot. Let crepes cool slightly before designing, and don't drag the toothpick through chocolate that has already set.
Tearing Crepes
Problem: Crepes tear when flipping or handling
Solution: Make sure the crepe is properly cooked before flipping. The edges should be dry and slightly curled, and the bottom should be golden. Use a thin spatula for flipping.
Lumpy Batter
Problem: Crepe batter has lumps
Prevention: Sift the flour and cocoa powder before mixing. For stubborn lumps, strain the batter through a fine mesh sieve or blend briefly with an immersion blender.
Uneven Cooking
Problem: Crepes cook unevenly with pale and dark spots
Recovery: Ensure your pan is evenly heated by preheating for several minutes. Check that the pan is level on the burner, and make sure to swirl the batter to create an even layer.
Sticky Crepes
Problem: Crepes stick to the pan despite using butter
Prevention: Your pan may not be hot enough. Make sure it's properly preheated before adding butter and batter. Also, non-stick pans with a good coating work best for beginners.
Flavor Balance Issues
Too Sweet: Add a pinch of salt to the filling or a few drops of lemon juice
Too Salty: Increase the powdered sugar in the filling or drizzle with honey before serving
Bland: Add 1/4 tsp cinnamon and a dash of nutmeg to the batter, or 1/2 tsp orange zest to the filling

Working with Two Batters
Creating both plain and chocolate crepes offers versatility for your Halloween presentation. The plain crepes provide the perfect canvas for the dark chocolate web design, creating maximum contrast. Meanwhile, the chocolate crepes can be used as dramatic layers in a crepe cake or as the exterior wrap for filled crepes.
When preparing both batters, start with one master batter that you divide, rather than making two separate batters. This ensures consistency in texture and cooking properties, with the only difference being the addition of cocoa to one portion. The resting period is crucial for both batters, allowing the flour to fully hydrate and the tiny air bubbles to dissipate.
Essential Ingredient Notes
- Cocoa Powder Selection: Dutch-processed cocoa creates a deeper, more intense color perfect for Halloween themes. Natural cocoa works too but produces a lighter color with more acidic notes.
- Chocolate for Web Design: Chocolate chips with a higher cocoa butter content melt more smoothly. Baking chocolate or couverture chocolate will give you the cleanest lines for web designs.
- Milk Choice: Whole milk creates the most tender crepes, but you can substitute with almond or oat milk for a dairy-free version. The fat content affects the crepe's tenderness and flavor.
Presentation for Maximum Spook Factor
The visual impact of these Halloween crepes comes from thoughtful presentation. Serve on black plates to make the web design pop, and consider using a touch of orange in your filling or garnish to incorporate traditional Halloween colors. Edible silver or gold luster dust sprinkled sparingly over the web creates an elegant spider silk effect.
For a showstopping centerpiece, create a crepe cake by stacking 15-20 crepes with thin layers of filling between each. Alternate plain webbed crepes with chocolate crepes, and finish with a dramatic web design on top. This impressive dessert can be sliced like a cake, revealing beautiful layers inside.
The Toothpick Technique
When creating the web effect, use a light touch with the toothpick. Start by drawing 8 equidistant lines (like a pizza cut into 8 slices), then add connecting lines between those for a more elaborate web. The fewer lines you make, the cleaner and more dramatic each line will appear.
Halloween Spiderweb Crepes
📋 Ingredients
For the Crepe Batters
- 225g cream cheese, softenedCreates creamy base for filling
- 120ml heavy creamAdds lightness to filling
- 60g powdered sugarSweetens filling without graininess
- 60g chocolate chipsFor creating web design
- Orange food coloring (optional)For Halloween-themed filling
- Plastic spiders for decoration (optional)Adds fun holiday touch
- Fresh berries for serving (optional)Adds freshness and color
For the Filling and Decoration
- 240g all-purpose flourBase for crepe batter
- 60g unsweetened cocoa powderFor chocolate batter variation
- 4 large eggsProvides structure
- 720ml milkCreates thin, pourable batter
- 60ml melted butter, plus more for cookingAdds richness and prevents sticking
- 60ml maple syrup or sugarLightly sweetens batter
- 1/2 tsp saltBalances flavors
Instructions
Prepare Batters
In a large bowl, whisk together flour, eggs, milk, melted butter, sweetener, salt, and vanilla until smooth. Transfer half the batter to another bowl and whisk in cocoa powder until fully incorporated. Let both batters rest for 15 minutes.
Melt Chocolate
Place chocolate chips in a microwave-safe bowl. Heat in 20-second intervals, stirring between each, until completely melted. Transfer to a small piping bag or squeeze bottle.
Cook White Crepes
Heat a non-stick crepe pan or skillet over medium heat. Lightly butter the surface. Pour about 1/4 cup of plain batter and swirl to coat the bottom of the pan. Cook until edges look dry and the bottom is golden, about 2 minutes. Flip and cook for another minute. Repeat with remaining batter.
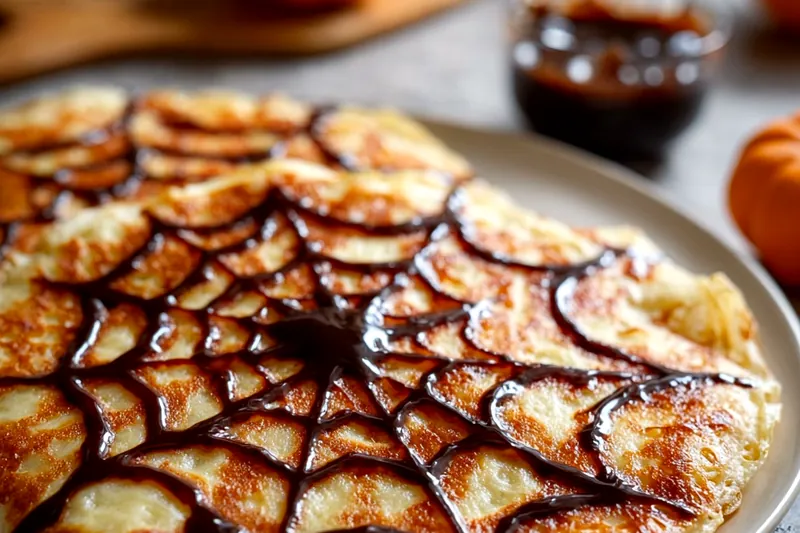
Create Spiderwebs
For each plated white crepe, use the melted chocolate to draw a spiral starting from the center and working outward. Then, using a toothpick, drag lines from the center to the edge at regular intervals to create a web effect. Let chocolate set for a minute.
Make Filling
Beat cream cheese until smooth. Add heavy cream, powdered sugar, and vanilla extract. Beat until fluffy. If desired, divide mixture and color half with orange food coloring.
Assemble and Serve
Spread a layer of filling on each crepe and fold or roll. Alternatively, stack crepes with filling between layers for a crepe cake. Top with fresh berries and decorative plastic spiders if desired. Serve immediately.
Recipe Notes & Tips
Storage
Unfilled crepes can be stored in the refrigerator for up to 3 days with parchment paper between each layer. Reheat briefly in a skillet or microwave before adding the web design and filling.
Serving Suggestions
Serve with a drizzle of warm chocolate sauce, a dusting of powdered sugar 'cobwebs,' or alongside Halloween-themed fruits like orange segments and blackberries.
Variations
For a savory version, omit the sugar and vanilla from the batter, fill with cream cheese mixed with herbs, and create web designs with dark food coloring mixed into cream cheese.