Halloween Witch Cookies
Spooky and delightful Halloween witch cookies with vibrant green frosting, chocolate witch hats, and pretzel broomsticks. Perfect for festive parties, trick-or-treaters, and Halloween celebrations.


Mastering the Perfect Cookie Base
The foundation of a great witch cookie is a sugar cookie that holds its shape during baking while remaining tender when eaten. Chilling the dough is absolutely essential - it prevents spreading during baking and helps maintain the perfect round shape that serves as the witch's face.
Adding a small amount of almond extract alongside the vanilla creates a more complex flavor profile that elevates these cookies beyond basic sugar cookies. The slight nuttiness complements the sweet icing and chocolate elements that will be added later.
💡 Professional Tip
For cookies with perfectly smooth tops, chill the cut cookie shapes again for 10 minutes before baking. This extra step helps prevent any bubbling or doming during baking, creating the ideal flat surface for decorating.
Frequently Asked Questions
Absolutely! The undecorated cookies can be baked up to 3 days ahead and stored in an airtight container. Once decorated, they're best within 2 days, though they'll stay fresh for up to 5 days in an airtight container.
Gel food coloring produces the most vibrant witch-green color. Add a small amount at a time until you reach the desired shade. Combining a base of leaf green with a tiny touch of black can create a more mysterious, witchy tone.
Yes, but it's best to freeze them undecorated. The baked plain cookies freeze well for up to 3 months. Thaw completely before decorating. Fully decorated cookies can be frozen, but the decoration quality may be affected.
Chocolate-covered cherries work well, as do junior mints placed on chocolate wafer cookies. For a completely different approach, cut witch hat shapes from black fondant or modeling chocolate.
Cover your bowl of icing with a damp paper towel when not in use. If using a piping bag, cap the tip with a damp cloth. The corn syrup in this recipe also helps extend working time compared to traditional royal icing.
Yes, replace corn syrup with 2 tablespoons of honey or 2 tablespoons of granulated sugar dissolved in 1 tablespoon of warm water. The icing will have a slightly different sheen but will still work well.
These cookies are perfect for classroom parties! Consider any allergies in the class - you can substitute the almond extract with extra vanilla if nut allergies are a concern, and check that your sprinkles are allergen-free.
For best results, decorate 1-2 days before serving. The icing needs 2-3 hours to set completely. Once set, store in a single layer in an airtight container at room temperature.
Recipe Troubleshooting Guide
Cookies Spreading
Problem: Cookies lose their round shape during baking
Solution: Make sure dough is thoroughly chilled before baking. If your kitchen is warm, work with small portions of dough at a time, keeping the rest refrigerated.
Icing Too Runny
Problem: Green icing flows off the cookies and doesn't set
Solution: Add more powdered sugar, 1 tablespoon at a time, until you reach a consistency that stays on the cookie but still settles into a smooth surface.
Icing Too Thick
Problem: Icing doesn't spread and leaves peaks and ridges
Prevention: Add more milk, 1/2 teaspoon at a time, until the icing flows slowly but doesn't run off the cookie.
Witch Hats Falling Off
Problem: Chocolate hat assemblies don't stick to the cookies
Recovery: Make sure to place hats while the icing is still wet. Alternatively, use a dab of melted chocolate instead of icing to attach the hat more securely.
Uneven Cookie Thickness
Problem: Some cookies bake faster than others, resulting in uneven batches
Prevention: Use 1/4-inch wooden dowels as guides on either side of your dough when rolling to ensure uniform thickness throughout.
Flavor Balance Issues
Too Sweet: Reduce sugar in cookie dough by 2 tablespoons and add 1/4 teaspoon salt to the icing
Too Salty: Increase vanilla extract to 1 1/2 teaspoons in the cookie dough
Bland: Add 1/4 teaspoon cinnamon to cookie dough and increase almond extract to 3/4 teaspoon
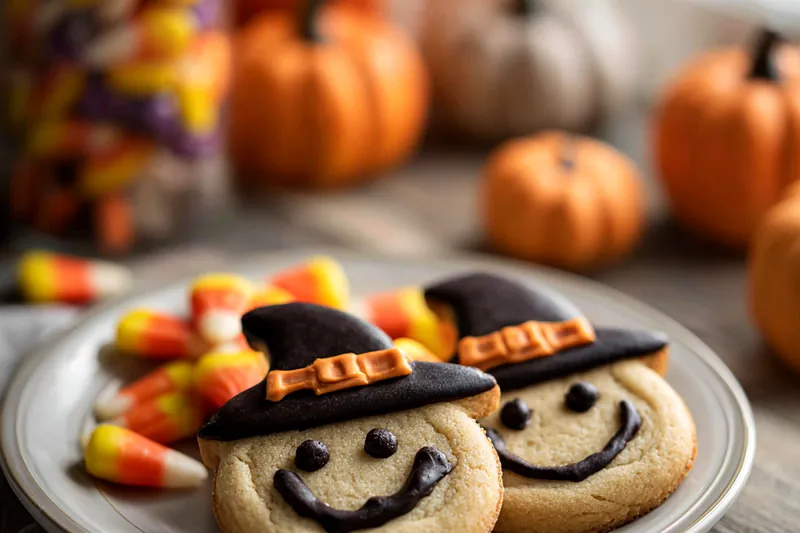
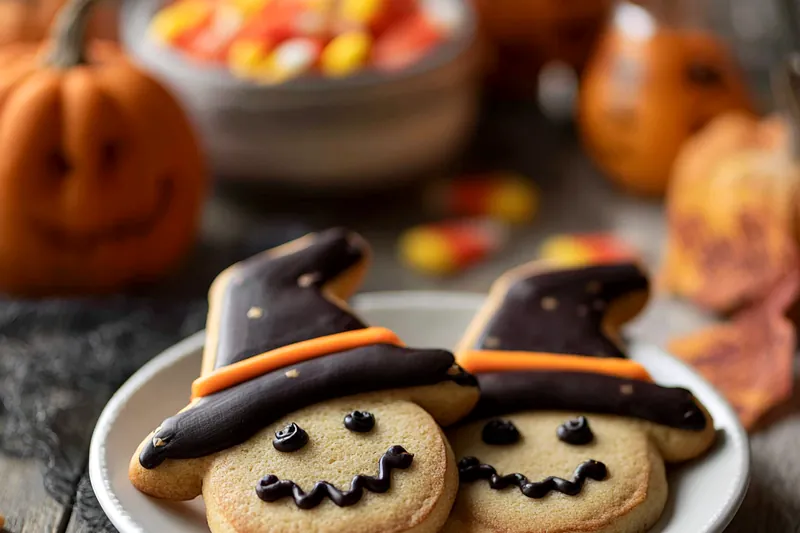
Decoration Techniques for Magical Witch Cookies
Creating the perfect witch aesthetic requires attention to detail. The green icing serves as the witch's face, while the chocolate kiss and cookie combination forms a classic pointed witch hat. The consistency of your icing is crucial - it should be fluid enough to self-level but thick enough to hold the decorations.
The pretzel broomstick is what transforms these from simple decorated cookies to character cookies that tell a story. Using black decorating icing to add bristles to the end of the pretzel stick creates a realistic broomstick effect that enhances the overall witch theme.
Essential Ingredient Notes
- Butter Quality: Use high-quality unsalted butter at room temperature for the best cookie texture. European-style butter with higher fat content creates an exceptionally tender cookie.
- Food Coloring: Gel or paste food colors produce more vibrant colors with less liquid than traditional food coloring. For witch-green, start with forest green and adjust with tiny amounts of black.
- Chocolate Selection: Dark chocolate kisses create more dramatic witch hats than milk chocolate. For a special touch, look for seasonal Halloween kisses that may come in purple or orange foil.
Creating the Perfect Presentation
For maximum visual impact, arrange these witch cookies on a black or dark purple serving platter. Scatter orange and purple sprinkles or candy corn around the cookies to enhance the Halloween theme. Consider adding battery-operated string lights with orange bulbs around the display for a truly magical presentation.
If packaging these cookies as gifts or party favors, place them in clear cellophane bags tied with orange and purple ribbons. Add a custom tag with a witchy message like 'Something wicked this way comes' or 'Bewitched by your friendship' for a personal touch.
Perfect Royal Icing Consistency
The ideal icing consistency for these cookies is known as '15-second icing' - when you run a knife through the icing, the line should disappear in about 15 seconds. This ensures it will self-level on the cookie while still being thick enough to hold decorations.
Halloween Witch Cookies
📋 Ingredients
For the Cookie Dough
- 450g powdered sugarFor smooth, glossy icing
- 60ml milkAdjust as needed for consistency
- 30ml light corn syrupCreates shine and extends working time
- Green food coloringGel color produces best results
- 24 chocolate kissesFor witch hat points
- 24 mini chocolate cookiesFor witch hat brims
- 24 thin pretzel sticksFor broomstick handles
For the Decorations
- 375g all-purpose flourProvides structure for the cookies
- 1 tsp baking powderFor slight rise and tender texture
- 225g unsalted butter, softenedCreates tender, rich cookies
- 200g granulated sugarSweetens and helps with texture
- 1 large eggBinds ingredients together
- 1 tsp vanilla extractProvides classic flavor
- 1/2 tsp almond extractAdds depth of flavor
Instructions
Prepare Cookie Dough
In a medium bowl, whisk together flour, baking powder, and salt. In a large bowl, cream butter and sugar until light and fluffy. Beat in egg and extracts. Gradually add flour mixture until just combined. Divide dough in half, wrap in plastic, and refrigerate for 1 hour.
Shape and Bake
Preheat oven to 350°F (175°C). Line baking sheets with parchment paper. Roll dough to 1/4-inch thickness on floured surface. Cut circles using a 3-inch round cookie cutter. Transfer to prepared baking sheets. Bake for 10-12 minutes until edges are just turning golden. Cool completely on wire racks.
Make Royal Icing
In a large bowl, combine powdered sugar, milk, corn syrup, and vanilla. Beat until smooth. Adjust consistency with drops of milk if too thick. Add green food coloring to achieve a vibrant witch-green color. Transfer to a piping bag or use a knife for spreading.
Create Witch Hats
Attach chocolate kisses to mini chocolate cookies using a small amount of black decorating icing. Allow to set while decorating the cookies.
Assemble Witch Cookies
Spread green icing over each cookie. While icing is still wet, place witch hat on upper portion of cookie. Add a pretzel stick at the bottom to create a broomstick. Use black decorating icing to add details like bristles on the broomstick. Add sprinkles for decoration. Allow to dry completely for 1-2 hours.
Recipe Notes & Tips
Storage
Store decorated cookies in a single layer in an airtight container at room temperature for up to 5 days. Place parchment paper between layers if stacking is necessary.
Serving Suggestions
Serve alongside Halloween-themed beverages like purple punch or hot apple cider. For a complete dessert table, pair with other festive treats like chocolate spiders or ghost meringues.
Variations
For a different look, create purple witch cookies by changing the food coloring. You can also add edible glitter to the wet icing for 'magical sparkle' or use candy eyes to create witch faces on some cookies.