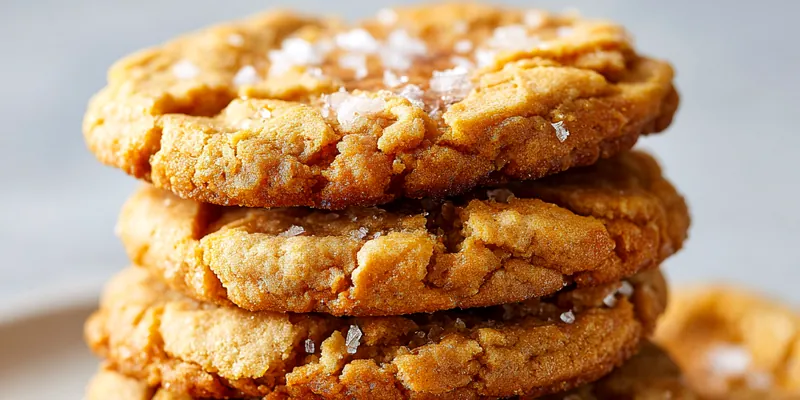
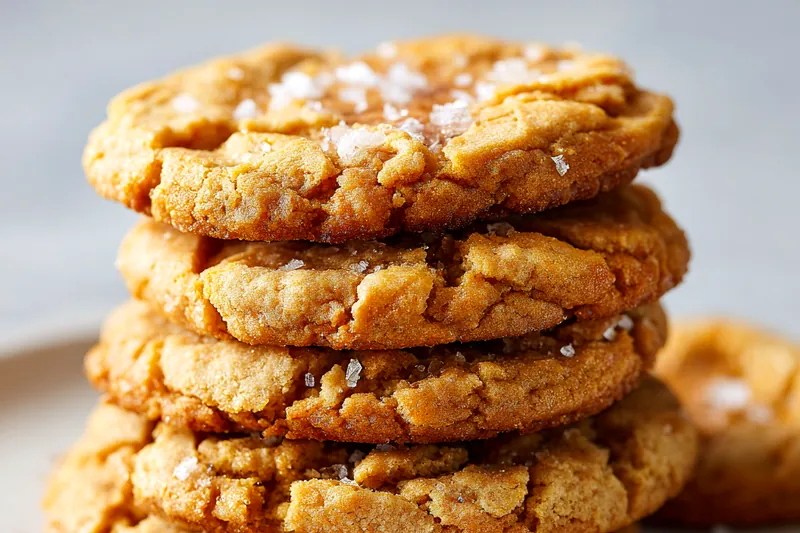
Salted Brown Butter Cookies
These salted brown butter cookies are the perfect combination of nutty richness and sweet-salty balance. Browning the butter creates deep, caramelized flavors that elevate a simple cookie into something truly special. The crispy edges and chewy centers make every bite irresistible.

The Secret to Perfect Brown Butter Cookies
Brown butter is the foundation of these exceptional cookies, transforming ordinary butter into a complex, nutty ingredient with caramelized depth. The process of browning butter requires careful attention as the milk solids separate and toast, creating those characteristic amber tones and aromatic compounds that smell like toasted hazelnuts. This chemical transformation, known as the Maillard reaction, develops hundreds of new flavor molecules that add sophistication to your baking. Using a light-colored saucepan is essential because it allows you to monitor the color change accurately, preventing the butter from burning and turning bitter.
The cooling period after browning is just as important as the browning itself, allowing the butter to reach the right temperature for properly incorporating with sugars. When brown butter is too hot, it can cook the eggs prematurely or melt the sugars too quickly, resulting in flat cookies. The ideal temperature is around 90-100°F, which is warm enough to dissolve the sugars but cool enough to maintain structure. Chilling the dough after mixing is another critical step that prevents excessive spreading during baking, ensuring you get those perfect crispy edges while keeping the centers wonderfully chewy.
💡 Professional Tip
Save the brown butter solids that settle at the bottom of your cooling bowl and mix them thoroughly into the dough for maximum flavor impact. Some bakers strain them out, but those toasted bits are pure gold.
Frequently Asked Questions
Absolutely! The cookie dough can be made up to 3 days in advance and stored in the refrigerator, or frozen for up to 3 months. For refrigerated dough, let it sit at room temperature for 5-10 minutes before scooping to make handling easier. Frozen dough balls can be baked directly from the freezer by adding 2-3 extra minutes to the baking time. You can also brown the butter up to a week ahead and store it in an airtight container in the fridge, then bring it to room temperature before using.
All-purpose flour works best for the ideal texture, but you can make substitutions with some adjustments. For a 1:1 gluten-free flour blend, the cookies will be slightly more crumbly but still delicious. Whole wheat flour can replace up to half the all-purpose flour for a nuttier flavor, though this will make the cookies denser. Bread flour will create chewier cookies with more structure, while cake flour will make them more tender and delicate. Avoid substituting more than 25% of the flour without testing first.
Chilling the dough serves multiple purposes that directly impact your final cookie quality. First, it solidifies the butter, which slows spreading during baking and helps maintain a thicker cookie shape. Second, it allows the flour to fully hydrate, which improves texture and creates more consistent results. Third, it gives the flavors time to meld together, particularly important with brown butter's complex notes. The 30-minute minimum chill is recommended, but overnight chilling actually improves flavor development even more.
Flaky sea salt like Maldon, Jacobsen, or fleur de sel is ideal for topping because the large, irregular crystals provide bursts of saltiness and a delightful crunch. These salts are less dense than table salt, so they season without overwhelming. If you don't have flaky salt, you can use coarse sea salt, but use it sparingly as it's more concentrated. Avoid table salt for topping as the fine grains dissolve too quickly and distribute unevenly, potentially making cookies taste too salty.
Perfect brown butter cookies should have golden-brown edges that look set and crispy, while the centers still appear slightly underbaked and puffy. They should not look wet, but they shouldn't be completely firm either. The cookies will continue cooking on the hot baking sheet after you remove them from the oven, a process called carryover cooking. If you wait until the centers look fully baked in the oven, you'll end up with dry, overcooked cookies. Look for edges that have deepened to a golden-caramel color, which typically happens at the 11-12 minute mark at 350°F.
These cookies pair beautifully with cold milk, strong coffee, or espresso, as the slight bitterness balances the sweet richness. For a dessert experience, serve them alongside vanilla ice cream or use them to make ice cream sandwiches. They're also excellent crumbled over yogurt parfaits or served with fresh berries and whipped cream. For a sophisticated pairing, try them with a glass of dessert wine like Sauternes or a tawny port, which complements the caramelized butter notes.
Yes! These cookies are a perfect base for additions. Fold in 1 cup of dark chocolate chips, chopped toasted pecans, or toasted walnuts after combining the wet and dry ingredients. White chocolate chips and macadamia nuts create a luxurious combination, while toffee bits add extra caramel notes. Keep mix-ins to 1-1.5 cups total to maintain the proper dough consistency. Toast nuts beforehand to enhance their flavor and ensure they complement rather than compete with the brown butter.
Store completely cooled cookies in an airtight container at room temperature for up to 5 days, placing parchment paper between layers to prevent sticking. For longer storage, freeze cookies in a freezer-safe container or bag for up to 3 months. To refresh stored cookies, warm them in a 300°F oven for 3-5 minutes to restore the crispy edges. Never store cookies while they're still warm, as trapped moisture will make them soggy. Add a slice of bread to the container to help maintain moisture and keep cookies from drying out.
Recipe Troubleshooting Guide
Cookies Spreading Too Much
Problem: Your cookies spread into thin, flat discs instead of maintaining their shape, resulting in crispy cookies throughout without the desired chewy center.
Solution: This usually happens when the dough is too warm or the butter wasn't chilled properly. Make sure to refrigerate your dough for the full 30 minutes, and if your kitchen is warm, chill it for up to an hour. Also ensure your brown butter cooled completely before mixing with sugars. Using room temperature butter instead of cooled brown butter, or placing dough on warm baking sheets can also cause excessive spreading. Always use cool or room temperature baking sheets.
Cookies Are Too Hard
Problem: The cookies turned out hard and crunchy throughout instead of having the perfect chewy center texture.
Solution: Overbaking is the most common culprit. Remove cookies when the edges are golden but centers still look slightly underdone. They'll continue cooking on the hot pan. Also check that you're measuring flour correctly by spooning it into the measuring cup and leveling off, rather than scooping directly which packs in too much flour. Overmixing the dough can also develop too much gluten, resulting in tough cookies. Mix just until ingredients are combined.
Brown Butter Tastes Burnt
Problem: The cookies have an unpleasant, acrid, or bitter flavor that overpowers the other ingredients.
Prevention: You've taken the butter past the brown stage into burnt territory. Brown butter should smell nutty and aromatic, with a deep amber color. If it smells sharp or bitter, or looks very dark brown, it's burnt. Watch carefully during the browning process and remove from heat as soon as you see golden-brown color and smell that toasted nut aroma. Using a light-colored pan helps you monitor the color accurately. If you accidentally burn it, start over rather than trying to salvage it.
Cookies Are Too Salty
Problem: The finished cookies taste overly salty, making them unpleasant to eat.
Recovery: This usually comes from using too much flaky salt on top or using fine salt instead of flaky salt. Use just a small pinch (3-4 flakes) per cookie. If you accidentally oversalted the dough itself, you can't fix it, but you can balance future batches by reducing the fine sea salt in the dough to 1/4 teaspoon. Remember that flaky salt is for topping only and provides texture and flavor bursts, while the fine salt in the dough should be measured precisely.
Cookies Don't Have Crispy Edges
Problem: The cookies are soft throughout without the desired crispy, caramelized edges that provide textural contrast.
Prevention: Increase your oven temperature slightly to 360°F or bake for 1-2 minutes longer. Make sure you're using parchment paper rather than greased pans, as parchment promotes better browning. Also ensure you're spacing cookies at least 3 inches apart to allow proper air circulation. Using dark-colored baking sheets can help develop crispier edges faster. If cookies are uniform but too soft, the dough may need less flour or the butter needs to be cooler when mixing.
Flavor Balance Issues
Too Sweet: If cookies are too sweet, reduce granulated sugar by 2 tablespoons and increase the flaky sea salt topping slightly to balance sweetness with more salt contrast.
Too Salty: If cookies taste too salty, reduce fine sea salt in dough to 1/4 teaspoon and use only 2-3 flakes of sea salt per cookie on top.
Bland: If cookies lack depth, ensure you browned the butter to a deep amber color and scraped all the toasted milk solids into your dough. Consider adding 1/4 teaspoon of cinnamon or using dark brown sugar instead of light.

Choosing the Right Ingredients for Superior Cookies
The quality of your ingredients directly impacts the final cookie, especially when working with such a simple recipe where each component shines. Using high-quality unsalted butter is essential because you're browning it to concentrate its flavor, and any off-notes in cheap butter will be amplified. European-style butter with higher fat content creates even richer results, though standard American butter works beautifully. Fresh eggs at room temperature emulsify better with the butter and sugar, creating a smoother dough that bakes more evenly. Cold eggs straight from the refrigerator can cause the brown butter to resolidify into clumps.
Sugar selection matters more than most bakers realize. Light brown sugar contains molasses that adds moisture and chewiness while complementing the caramel notes in brown butter. Using all granulated sugar will create crispier cookies, while all brown sugar makes them too soft and cake-like. The combination provides perfect balance. For the topping salt, invest in quality flaky sea salt like Maldon or Jacobsen, as the crystal size and mineral content affect both flavor and texture. The large, irregular flakes provide satisfying crunch and controlled saltiness that enhances rather than overwhelms. Finally, use pure vanilla extract rather than imitation, as the complex vanilla compounds harmonize with the nutty brown butter in ways artificial vanillin cannot.
Essential Ingredient Notes
- Unsalted Butter: Choose high-quality unsalted butter for browning, preferably European-style with 82% fat content for richer flavor. The butter must be unsalted so you can control the salt level precisely. Light-colored butter (not overly yellow) typically has fresher, cleaner flavor that browns beautifully without bitterness.
- Light Brown Sugar: Use fresh, soft light brown sugar that clumps when squeezed. Hard, dried-out brown sugar won't incorporate properly and will create texture issues. If your brown sugar is hard, microwave it with a damp paper towel for 20 seconds to soften before using. The molasses content adds moisture and complex flavor.
- Flaky Sea Salt: Invest in proper flaky sea salt like Maldon, Jacobsen, or fleur de sel for topping. The large, pyramid-shaped crystals provide the perfect amount of crunch and salty burst without dissolving into the cookie. Regular table salt or fine sea salt will make cookies taste overly salty because they dissolve too quickly.
Mastering the Brown Butter Cookie Technique
Browning butter is a simple technique that requires attention and patience rather than complex skills. Start with a light-colored saucepan so you can accurately see the color change from yellow to golden to amber. Heat over medium, not high, temperature to give yourself more control and prevent burning. As the butter melts, it will foam vigorously as water evaporates, then the foam will subside and you'll see the milk solids beginning to brown. Swirl the pan gently to ensure even cooking. The transformation from golden to deep amber happens quickly in the final minute, so watch carefully and trust your nose. When you smell toasted hazelnuts and see deep golden-brown specks, immediately remove from heat and pour into a heatproof bowl to stop the cooking.
The mixing method is just as crucial as the browning. When combining the cooled brown butter with sugars, whisk vigorously for a full two minutes to aerate the mixture and dissolve the sugars, creating a lighter, fluffier base. This aeration helps create the cookie's tender crumb. When adding the dry ingredients, switch to gentle folding with a spatula to avoid overdeveloping gluten, which would make cookies tough. The dough should look slightly rough and shaggy rather than perfectly smooth. During baking, resist the urge to open the oven door frequently, as temperature fluctuations affect how cookies spread and set. The final five-minute rest on the hot baking sheet is essential for setting the structure while keeping centers soft.
The Perfect Brown Butter Temperature
After browning, let the butter cool to 90-100°F before mixing with other ingredients. This temperature is warm enough to easily combine with sugars but cool enough that it won't cook the eggs or melt the dough structure. Touch the bowl - it should feel barely warm to the touch. If you're in a hurry, place the bowl in an ice bath for 5 minutes, stirring occasionally, but don't let it resolidify. The butter should remain liquid and pourable.
Salted Brown Butter Cookies
📋 Ingredients
Wet Ingredients
- 1 cup (2 sticks) unsalted butterUse high-quality butter for best flavor. Must be unsalted to control salt level.
- 1 cup granulated sugarProvides sweetness and helps create crispy edges
- 3/4 cup packed light brown sugarAdds moisture and chewiness, pack firmly when measuring
- 2 large eggs, room temperatureRoom temp eggs mix more smoothly with butter
- 2 teaspoons vanilla extractUse pure vanilla extract, not imitation
Dry Ingredients
- 2 1/4 cups all-purpose flourSpoon into cup and level off for accurate measurement
- 1 teaspoon baking sodaHelps cookies spread and develop color
- 1/2 teaspoon baking powderAdds lift and lighter texture
- 1/2 teaspoon fine sea saltFor the dough itself, not the topping
- Flaky sea salt for toppingMaldon or similar flaky salt, use sparingly
Instructions
Brown the Butter
In a light-colored saucepan over medium heat, melt butter completely. Continue cooking, swirling the pan occasionally, until the butter turns golden brown and smells nutty, about 5-7 minutes. Watch carefully to prevent burning. Pour into a heatproof bowl and let cool for 15 minutes.
Mix Wet Ingredients
Add both sugars to the cooled brown butter and whisk vigorously for 2 minutes until well combined and slightly lighter in color. Add eggs one at a time, whisking well after each addition. Stir in vanilla extract.
Combine Dry Ingredients
In a separate bowl, whisk together flour, baking soda, baking powder, and fine sea salt. Add the dry ingredients to the wet ingredients and fold gently with a spatula until just combined. Do not overmix. Cover and refrigerate dough for 30 minutes.
Shape and Bake
Preheat oven to 350°F. Line baking sheets with parchment paper. Scoop 2-tablespoon portions of dough and roll into balls. Place 3 inches apart on prepared sheets. Sprinkle each with a pinch of flaky sea salt. Bake for 11-13 minutes until edges are golden but centers still look slightly underdone. Cool on baking sheet for 5 minutes before transferring to a wire rack.
Recipe Notes & Tips
Storage
Store cookies in an airtight container at room temperature for up to 5 days, or freeze for up to 3 months. Cookie dough can be refrigerated for 3 days or frozen for 3 months. Bake frozen dough balls directly from freezer, adding 2-3 minutes to baking time.
Serving Suggestions
Serve with cold milk, coffee, or espresso. Excellent alongside vanilla ice cream or as ice cream sandwiches. Can be crumbled over yogurt parfaits or served with fresh berries and whipped cream. Pair with dessert wine for an elegant touch.
Variations
Add 1 cup dark chocolate chips, chopped toasted pecans, or walnuts. Try white chocolate and macadamia nuts, or toffee bits for extra caramel flavor. Reduce add-ins to 1-1.5 cups total. Can substitute up to half the flour with whole wheat for nuttier flavor.